Crossed stitches · Easy
Herringbone stitch
Herringbone stitch is a band of slanting stitches that cross each other near the top and bottom edges, like a row of overlapping X shapes. It is worked from left to right between two parallel lines.
How to work it
Come up on the lower line

Mark two parallel lines. Herringbone stitch is worked from left to right. Bring the needle up at A, at the left end of the lower line.
Go down on the upper line

Take the thread up and to the right, and push the needle down at B on the upper line. This makes the first slanting stitch.
Step back and come up

Under the fabric, move a short way back to the left along the upper line. Bring the needle up at C.
Cross down to the lower line

Take the thread down and to the right, over the first stitch, and go down at D on the lower line. The two stitches cross close to the upper line.
Step back again on the lower line

Under the fabric, move the same short way back to the left and come up at E. Then slant up to the right again, as you did from A to B.
Repeat along the band

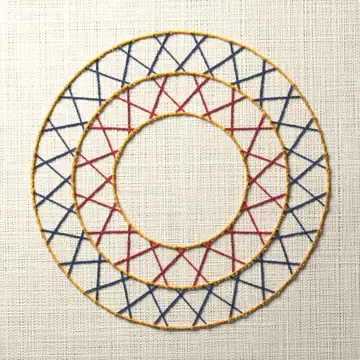
Keep going: slant across, take a short step back, slant across again. Every stitch crosses the one before it, and the crosses sit near the two lines.
At a glance
- Also called
- catch stitch, plaited stitch, Russian cross stitch, Mossoul stitch
- Used for
- borders and bands; decorating seams on crazy quilts; fastening down a raw seam edge or an applique edge; filling narrow shapes such as stems; a base for threaded, tied and double herringbone
- Thread
- Three strands of six-strand floss are a good place to start. Pearl cotton in size 5 or 8 works too. Use fewer strands for a finer line and more for a bolder band.
- Needle
- An embroidery (crewel) needle. Size 7 suits two to four strands of floss, and size 9 suits one or two. A chenille needle has a longer eye for thicker thread or wool.
Tips
- Draw two parallel lines before you start, or follow the weave of an evenweave fabric.
- Keep the short step back the same length every time, and keep the slanting stitches parallel to each other. Dots marked along both lines make the spacing easy to hold.
- You can make each step back in one scooping motion: put the needle in on the line and bring it out a short way to the left, with the needle pointing left.
- The stitch takes gentle curves well. On a curve, plan where the stitches will go first so they stay even all the way around.
When it goes wrong
- The crosses sit in the middle of the band
- The step back is too long. Make it no more than half the sideways distance each slanting stitch covers, so the threads cross near the edges.
- The zigzag is uneven
- Mark evenly spaced dots on both lines before you start, with the dots on one line set halfway between the dots on the other.
- The stitches sit too tight or too loose
- Keep the fabric taut in a hoop so each stitch lies flat on it.
- Some stitches cross under instead of over
- Each new slanting stitch always lies on top of the one before it. Take out the stitch and lay it again over the last one.
Left-handed
Work from right to left. Mirror the diagrams: slant each stitch to the left, and take each short step back to the right.
Variations
- Closed herringbone stitch. The stitches are worked so close together that they form a solid band. On the back it forms two rows of back stitch, which is why it is used for shadow work.
- Double herringbone stitch. A second row, usually in another color, is worked into the gaps of an open first row so that the two rows interlock.
- Tied herringbone stitch. A small upright stitch in a second color is worked over every cross to hold it down. It is also called couched or tacked herringbone stitch.
- Threaded herringbone stitch. A second thread is woven under and over the stitches along the band. It goes through the fabric only at the two ends.
Patterns that use it
Questions
- Is herringbone stitch the same as catch stitch?
- Yes. Catch stitch is another name for herringbone stitch. In plain sewing the stitch is used to fasten down the raw edges of a seam in place of hemming. In embroidery it is worked on the surface as a decorative band.
- What is the difference between herringbone stitch and cross stitch?
- In cross stitch each X is separate and the two legs cross in the middle. In herringbone stitch the stitches overlap in a continuous band, and they cross near the top and bottom edges.
- What is closed herringbone stitch?
- It is herringbone stitch with the stitches worked close together, so the band is solid. The back shows two rows of back stitch. It is often used for borders and for shadow work.