Straight stitches · Easy
Sheaf stitch
Sheaf stitch is three upright straight stitches tied together around the middle, so they pinch in like a bundle of wheat. It is worked as single motifs, in rows as a border, or scattered over a shape as a filling.
How to work it
Make an upright stitch

Mark two level lines to set the height. Bring the needle up at A on the lower line and take it down at B, straight above.
Add two more beside it

Make two more upright stitches the same height, from C to D and from E to F. Keep them close together, with only a small gap between them.
Come up beside the middle stitch

Bring the needle up at G, halfway up and just to the left of the middle stitch. Ease it out to the left, under the first stitch.
Wrap around the bundle

Carry the thread across the front of all three stitches. Then slide the needle back behind them from right to left, without catching the fabric, and pull the thread through.
Pull snug, wrap again and go down

Pull until the three stitches draw together at the middle. Wrap around them once more for a firmer tie, then take the needle down through the fabric behind the bundle.
Repeat for a row or a filling

Work the next sheaf a short distance away. For a filling, set the sheaves of each row under the gaps of the row above.
At a glance
- Also called
- sheaf filling stitch, bundle stitch, wheat stitch
- Used for
- open fillings; borders worked in rows or columns; single sheaves scattered over a shape
- Thread
- Three strands of six-strand floss are a good place to start. Pearl cotton in size 5 or 8 works too. Use fewer strands for a finer sheaf and more for a bolder one.
- Needle
- An embroidery (crewel) needle. Size 7 suits two to four strands of floss. For the tie, a blunt tapestry needle slides under the stitches without snagging them, or you can pass a sharp needle under eye first.
Tips
- Make the three upright stitches the same length and keep them close to each other.
- Three stitches is the usual number, but four or five can be tied the same way.
- Slide the needle behind the stitches eye first, or use a blunt tapestry needle for the tie, so you do not pick up the fabric.
- Sheaves can sit side by side in a row or one above another in a column.
When it goes wrong
- The stitches will not draw together
- They may be too far apart. Work the three stitches close to each other so the tie can pinch them in.
- The tie sits above or below the middle
- Come up and go down exactly halfway up the stitches, hidden behind the middle one.
- The tie is caught on the fabric
- The needle picked up fabric while wrapping. Slide it between the stitches and the fabric, eye first.
- The sheaves are different sizes
- Work between two marked lines and mark the position of each stitch with a dot.
Left-handed
Mirror the diagrams: bring the tying thread up to the right of the middle stitch and slide the needle behind the bundle from left to right. The direction of the wrap does not change the look.
Variations
- Sheaf with more stitches. Four or five upright stitches are tied instead of three.
- Single-wrap sheaf. The tying thread goes around the bundle once instead of twice.
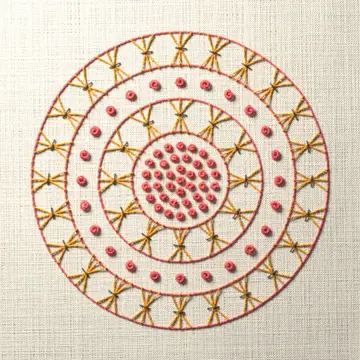
- Sheaf filling. Rows of sheaves cover a shape, with each row offset from the last to make an open filling.
Patterns that use it
Questions
- How many stitches are in a sheaf stitch?
- Usually three upright stitches of the same length, tied around the middle with one or two wraps. Some stitchers use four or five upright stitches.
- Is sheaf stitch the same as sheaf filling stitch?
- It depends on the source. Some tutorials call the small tied bundle shown here sheaf stitch. Some stitch libraries call it sheaf filling stitch and keep the name sheaf stitch for a different stitch, a raised band of wheatsheaf shapes tied in the middle.
- How do I use sheaf stitch as a filling?
- Work the sheaves side by side in rows or columns. For an open filling, offset each row so its sheaves sit under the gaps of the row above.