Filling stitches · Easy
Leaf stitch
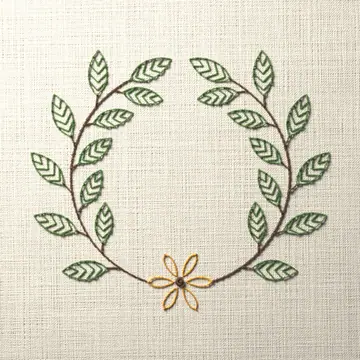
Leaf stitch is a light, open filling made for leaf shapes. Slanting stitches are worked from side to side, from the base of the leaf to its tip, and cross near the center line. The name is also used loosely for solid leaf fillings such as fishbone stitch and satin stitch leaves.
How to work it
Come up beside the center line

Draw the leaf with a line down its center. Leaf stitch is worked from the base toward the tip. Bring the needle up at A, at the base, just to the left of the center line.
Slant up to the right edge

Take the needle down at B on the right edge of the leaf, a little higher than A. The stitch slants up and crosses the center line.
Come up on the other side of the line

Bring the needle up at C, level with A but just to the right of the center line.
Slant up to the left edge

Take the needle down at D on the left edge, level with B. This stitch crosses over the first one close to the center line.
Start the next pair above the first

Bring the needle up at E, a short way above A on the left of the center line, and slant up to the right edge again. Keep working one stitch to each side in turn.
Work up to the tip

Carry on to the tip, one stitch to each side in turn, until the leaf is lightly covered. The crossings line up along the center.
At a glance
- Used for
- leaves; border lines
- Thread
- There is no set number. The stitch is meant to cover the shape lightly, not solidly, so you do not need a thick thread to fill it.
- Needle
- An embroidery (crewel) needle. A size 7 suits about three strands of floss. Use a larger needle, which has a lower number, for more strands.
Tips
- Start every stitch beside the center line, on the far side from the edge it is heading for, so that it crosses the line.
- Keep the stitches apart. Leaf stitch is meant to cover the shape lightly, with fabric showing between the stitches.
- Finish the shape with an outline of stem stitch or chain stitch.
When it goes wrong
- The center vein wanders from side to side
- Draw the center line before you start, and begin each stitch the same small distance from it.
- The edge of the leaf looks ragged
- End every stitch on the outline, then work a firm line stitch such as stem stitch or chain stitch around the edge.
- The stitches do not cross in the middle
- Each stitch must start on the far side of the center line from the edge it is heading for, so that it passes over the line.
Left-handed
The stitch works the same way. If it is more comfortable, mirror the diagrams and start just to the right of the center line, slanting the first stitch up to the left.
Variations
- Fishbone stitch. The slanting stitches lie side by side with no fabric showing, so the leaf is filled solidly. It is worked from the tip of the leaf down.
- Open fishbone stitch. A spaced-out version of fishbone stitch worked from the tip toward the base.
- Satin stitch leaf. Each half of the leaf is filled with satin stitch, one side and then the other, so the center vein shows where the halves meet. Some tutorials call this leaf stitch too.
- Leaf stitch band. The same stitch can be worked along a border line instead of inside a leaf outline.
Patterns that use it
Questions
- Which stitch should I use to embroider a leaf?
- For a solid leaf, use fishbone stitch or satin stitch. For a light, open leaf, use leaf stitch or open fishbone stitch.
- What is the difference between leaf stitch and fishbone stitch?
- Both use slanting stitches that cross at the center of a leaf. Fishbone stitch packs them tightly for a solid fill and starts at the tip. Leaf stitch spaces them out, starts at the base and leaves fabric showing between the stitches.
- Do I need to outline a leaf worked in leaf stitch?
- It is usual. The filling is light, so the leaf is normally finished with a firm outline in stem stitch or chain stitch.