Outline stitches · Beginner
Split stitch
Split stitch is a line stitch in which the needle comes up through the middle of the stitch before it, splitting the thread. The stitches lock into each other and make a fine line that looks like a tiny chain.
How to work it
Come up at the start of the line

Split stitch is shown here worked from left to right, but it does not depend on direction. Bring the needle up at A, at the start of the line.
Make one straight stitch

Go down at B, one stitch length along the line, and pull the thread through so the stitch lies flat.
Come up through the middle of the stitch

Bring the needle up at C, halfway along the stitch, straight through the thread itself. Aim to split the thread in the middle.
Go down one stitch length ahead

Push the needle down at D, a full stitch length from C, and pull the thread through.
Split the new stitch

Come up at B, where the first stitch ended. That is the middle of the stitch you just made, so the needle splits it in the same way.
Repeat along the line

Keep going: down a full stitch ahead, then up through the middle of the stitch you just made. The row builds into a fine chain.
At a glance
- Also called
- Kensington outline stitch
- Used for
- fine outlines; lettering and delicate curves; an edge under satin stitch and long and short stitch; filling shapes with close rows
- Thread
- Split stitch can be worked in one strand or several. A single thick strand, such as pearl cotton, is easy to split in the middle. With two strands of floss the split tends to fall between the two strands. More strands make a heavier line.
- Needle
- An embroidery (crewel) needle with a sharp point. A size 8 suits two strands and a size 9 or 10 suits one. The point has to be sharp enough to pierce the thread.
Tips
- Soft threads that are not divided, such as wool, are among the easiest to split. Stranded floss and pearl cotton work too.
- Pull each stitch firmly so it hugs the fabric before you split it. A loose stitch that bulges up is harder to split in the middle.
- Use a sharp needle, so the point can pierce the thread.
- Split the stitch from below, coming up through it. Splitting it from above, on the way down, makes a different stitch called split back stitch. Coming up through the thread takes a little practice.
- Under satin stitch, work the split stitch right on the outline and then cover it. It lifts the edge and keeps it crisp.
When it goes wrong
- The needle comes up beside the stitch, not through it
- Slow down and aim for the middle of the thread. If you miss, pull the needle back and try again. A stitch that sits beside the last one is closer to stem stitch.
- The line looks lumpy
- The stitches are different lengths or are split at different points. Keep every stitch the same length and always split it at the halfway point.
- The thread shreds or frays
- Work with a shorter length of thread, and use a needle large enough for the thread to pass through the fabric easily.
Left-handed
Work from right to left and mirror the diagrams. Nothing else changes.
Variations
- Split back stitch. Worked like back stitch, but the needle goes down through the end of the previous stitch from above. It looks much the same and uses more thread on the back.
- Split stitch filling. Rows of split stitch worked close together, following the shape, until the fabric is covered. It was used for fine details such as faces in medieval English embroidery.
- Chain stitch. A bolder line of linked loops. Split stitch looks like a much finer version of it.
Patterns that use it
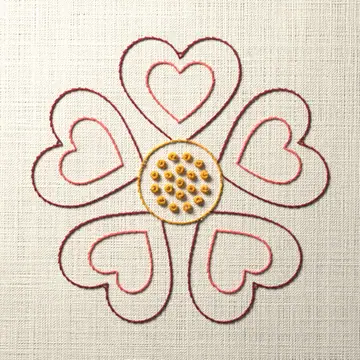
Questions
- How do you do a split stitch in embroidery?
- Make one straight stitch, then bring the needle up through the middle of that stitch so it splits the thread. Go down a stitch length ahead and repeat.
- How many strands should I use for split stitch?
- Any number works. A single thick strand is easy to split in the middle. With two strands of floss the split tends to fall between the two strands.
- What is the difference between split stitch and stem stitch?
- In stem stitch the needle comes up beside the previous stitch, which gives a twisted rope. In split stitch it comes up through the previous stitch, which gives a line that looks like a small chain.
- Why put split stitch under satin stitch?
- A split stitch outline gives the satin stitches an edge to go over. The edge of the shape comes out smooth and slightly raised.