Filling stitches · Intermediate
Long and short stitch
Long and short stitch fills a shape with rows of straight stitches that work into one another. The first row alternates long and short stitches, and each later row comes up through the ends of the row before, so the rows blend with no hard line between them. It is the stitch used for smooth shading from one color to the next.
How to work it
Come up inside the shape

Start in the middle of one edge. Bring the needle up at A, inside the shape, about 3/8 inch (1 cm) from the edge.
Go down on the outline

Take the needle down at B, on the edge of the shape. The first row is stitched from inside the shape out to the edge. This is a long stitch.
Add a short stitch beside it

Bring the needle up at C, right beside the first stitch but not as far from the edge. Go down on the edge next to B. This is a short stitch.
Alternate along the edge

Work out to one side, then go back to the middle and work out to the other. Alternate long and short, with the stitches touching and every one ending on the edge.
Second row: come up through the first

Bring the needle up at D, through a first-row stitch a little way back from its lower end, so the needle splits the thread. Go down at E in the empty fabric. Every stitch in this row is long.
Fill to the far edge

Add rows the same way, each one coming up through the row before. Change to the next shade when you start a new row. In the last row, take every stitch down on the far edge.
At a glance
- Also called
- shading stitch, plumage stitch, long and short satin stitch
- Used for
- filling shapes too large for satin stitch; shading from one color to the next; petals, leaves, animals and birds; needle painting, also called silk shading or thread painting
- Thread
- One strand of six-strand floss is a common choice for shading with this stitch. The technique was first worked in silk and is now often worked in stranded cotton.
- Needle
- An embroidery (crewel) needle with a sharp point, size 9 or 10 for one strand of floss. The sharp point matters, because the needle has to pierce the stitches of the row before.
Tips
- Outline the shape in split stitch first and take the first row down just outside it, so the stitches cover the outline.
- Only the first row has clearly long and short stitches. After that the stitches are all long, and the stagger comes from where each one starts.
- Do not make the lengths too regular. Varying where the stitches end by a little hides the joins between rows and looks more natural.
- Come up through the stitches of the row before, not between them. Splitting the thread is what makes the rows melt into each other.
- On a shape that fans out, such as a petal, draw a few direction lines first and let the stitches follow them.
- For shading, thread a separate needle for each shade, so you can bring a color in for a few stitches when you need it.
When it goes wrong
- A hard line shows between two rows
- The new row starts at the ends of the old one. Come up farther back, about a third of the way into the stitches above, and stagger the starting points.
- The stitch direction drifts
- Draw direction lines on the fabric before you start and check each stitch against them.
- The colors look striped, not blended
- Take the stitches of the new shade deep into the row before, and vary how far up each one starts.
Left-handed
Nothing about the stitch changes. Work each row from the middle out toward whichever side is comfortable first.
Variations
- Tapestry shading. Every stitch runs in the same direction, usually straight up and down, as in the diagrams here. The picture is made by changing the color of the thread.
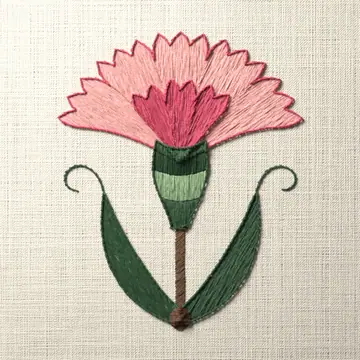
- Natural shading. The stitches change direction to follow the shape, fanning out along a petal or curving with a leaf. Animals and birds are traditionally worked this way.
- Brick stitch. A regular filling of same-length stitches in offset rows. The stitches meet end to end and do not split each other.
- Satin stitch. One layer of parallel stitches that each cross the whole shape. On a large shape the stitches get too long, and long and short stitch is one of the fillings to use in its place.
Patterns that use it
Questions
- What is long and short stitch used for?
- It is used to fill shapes that are too big for satin stitch and to shade smoothly from one color to another. Petals, leaves, animals and birds are common subjects.
- Are the stitches really long and short in every row?
- No. Only the first row alternates long and short stitches. The stitches in every later row are all about the same length. They look staggered because each one starts at a different height.
- How many strands should I use for long and short stitch?
- One strand of six-strand floss is a common choice for shading. There is no fixed rule.
- What is the difference between long and short stitch and satin stitch?
- In satin stitch every stitch crosses the whole shape. In long and short stitch the shape is covered by several rows of shorter stitches that overlap, so it can be any size and can change color from row to row.
- Is needle painting the same as long and short stitch?
- Needle painting, also called thread painting or silk shading, is a style of embroidery worked mostly in long and short stitch, with gradual changes of color that can give a painted look.